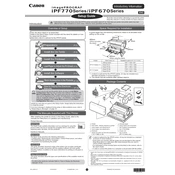
Canon imagePROGRAF iPF670 Series Setup Guide
![Canon imagePROGRAF iPF670 Series manual cover](/images/EWevWvdxNtUZGAiGIaEGOAwh/thumbs/thumb175x175.webp)
To replace the ink cartridges, turn the printer on, open the ink compartment cover, press the release lever on the cartridge you wish to replace, and then remove it. Insert the new cartridge until it clicks into place, and close the cover.
If your prints have streaks, perform a nozzle check and head cleaning using the printer's maintenance menu. If the issue persists, align the print head and ensure you are using compatible media.
Access the printer's menu, navigate to the 'Adjustment/Maintenance' section, and select 'Head Alignment'. Follow the on-screen instructions to complete the process.
Regularly clean the exterior with a soft, dry cloth. Use the printer's maintenance menu for cleaning the print head and perform a nozzle check periodically to ensure optimal performance.
Open the paper tray, adjust the guides to fit the paper size, and load the paper print-side up. Ensure that the paper is aligned properly and does not exceed the maximum capacity.
Check that the power cable is securely connected to both the printer and the power outlet. Ensure the outlet is working by testing another device. If the problem persists, contact Canon support.
Visit Canon's official website, download the latest firmware for the iPF670, and follow the installation instructions provided. Ensure the printer is connected and powered on during the update.
Remove and reinsert the ink cartridge to ensure it is properly seated. Check for any dirt or residue on the cartridge contacts. If the error persists, try using a new cartridge.
Yes, the Canon imagePROGRAF iPF670 supports borderless printing. Select the borderless option in the print settings menu before printing.
The Canon iPF670 does not support built-in wireless networking. Use a USB or Ethernet cable to connect the printer to your network or computer.