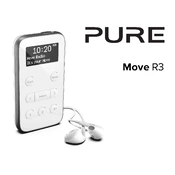
Pure Move R3 User Guide
![Pure Move R3 manual cover](/images/12307e7857931b003bc8df00/thumbs/thumb175x175.webp)
To perform a factory reset on the Pure Move R3, press and hold the Menu button until the settings menu appears. Navigate to 'Factory Reset' using the scroll buttons, select it, and confirm the action by pressing the OK button.
If your Pure Move R3 is not turning on, ensure the device is charged by connecting it to a power source. If it still does not turn on, try a factory reset. If the problem persists, contact customer support for further assistance.
To improve radio signal reception on your Pure Move R3, extend the antenna fully and reposition the device for optimal signal. You may also try moving to an area with fewer obstructions.
Yes, the Pure Move R3 is equipped with a headphone jack that allows you to connect any standard 3.5mm headphones for private listening.
To update the firmware on your Pure Move R3, connect the device to a computer via USB, visit the Pure website, download the latest firmware update, and follow the instructions provided to install it.
If your Pure Move R3 is not charging, check the USB cable and power source for any issues. Try using a different cable or power adapter. If the problem persists, the battery may need replacing or the device may require service.
To set the alarm on your Pure Move R3, press the Menu button, select 'Alarms', and then choose 'Set Alarm'. Use the scroll buttons to set the time and alarm sound, and confirm by pressing OK.
To clean your Pure Move R3, use a soft, dry cloth to wipe the exterior. Avoid using any harsh chemicals or abrasive materials as they may damage the surface.
To save your favorite radio stations on the Pure Move R3, tune to the desired station, press and hold one of the preset buttons until you hear a beep, indicating the station has been saved.
If the sound quality on your Pure Move R3 is poor, check if the antenna is fully extended and the signal is strong. Also, ensure the speakers are not obstructed and try adjusting the volume settings.