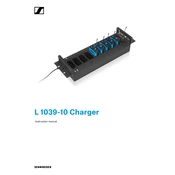
Sennheiser L 1039-10 v2 Instruction Manual
![Sennheiser L 1039-10 manual cover](/images/9df879d4cdb58cae32b5e95e/thumbs/thumb175x175.webp)
![English English](/static/img/blank.webp)
L 1039-10 Charger Instruction manual
L 1039-10 | 1
Important safety instructions
Important safety instructions 1. Read these safety instructions and the instruction manual of the product. 2. Keep these safety instructions and the instruction manual of the product. Always include all instructions when pass-
ing the product on to third parties. 3. Heed all warnings. 4. Follow all instructions. 5. Do not use this apparatus near water. 6. Only clean the product when it is not connected to the power supply system. Clean only with a dry cloth. 7. Do not block any ventilation openings. Install in accordance with the manufacturers instructions. 8. Do not install near any heat sources such as radiators, heat registers, stoves, or other apparatus (including amplifiers)
that produce heat. 9. Only operate the product from the type of power source specified in the chapter Specifications and indicated on the
power supply unit. 10. Protect the power cord from being walked on or pinched, particularly at plugs, convenience receptacles, and the point
where it exits from the apparatus. 11. Only use attachments/accessories specified by the manufacturer. 12. Use only with the cart, stand, tripod, bracket, or table specified by the manufacturer, or sold with the apparatus. When
a cart is used, use caution when moving the cart/apparatus combination to avoid injury from tip-over. 13. Unplug the power supply unit from the wall socket,
to completely disconnect the product from the power supply system, during lightning storms, when not using the product for long periods of time.
14. Refer all servicing to qualified service personnel. Servicing is required when the apparatus has been damaged in any way, such as power-supply cord or plug is damaged, liquid has been spilled or objects have fallen into the apparatus, when the apparatus has been exposed to rain or moisture, does not operate normally, or has been dropped.
15. Only use the supplied power supply unit. 16. Warning: To reduce the risk of fire or electric shock, do not expose this apparatus to rain or moisture and objects filled
with liquids, such as vases, should not be placed on this apparatus. 17. When using the supplied device feet, do not place the product on delicate surfaces. Delicate surfaces can become
discolored or stained when they come into contact with the plastic of the device feet. 18. Always ensure that the power supply unit is
in a safe operating condition and easily accessible, properly plugged into the wall socket, only operated within the permissible temperature range, not covered or exposed to direct sunlight for longer periods of time in order to prevent heat accumulation.
Risk of fire due to overloading Do not overload wall outlets and extension cables as this may result in fire and electric shock.
Intended use The product is designed for indoor and outdoor use.
The product can be used for commercial purposes.
It is considered improper use when the product is used for any application not named in the corresponding instruction manual.
Sennheiser does not accept liability for damage arising from improper use or misuse of this product and its attachments/ accessories.
Before putting the products into operation, please observe the respective country-specific regulations!
EN D
E FR
IT ES
PT N
L R
U ZH
2 | L 1039-10
Delivery includes
Delivery includes L 1039-10 charger NT 12-50C mains unit Mains cable (EU, UK, US) Instruction manual Supplement sheet Manufacturer declarations
A list of accessories can be found on the L 1039-10 product page at www.sennheiser.com.
For information on suppliers, contact your local Sennheiser partner: www.sennheiser.com > Service & Support.
The L 1039-10 charger The L 1039-10 charger is part of the Tourguide 1039 system.
The Tourguide 1039 system consists of the EK 1039 receiver and a suitable transmitter of the evolution wireless G3 or 2000 series. The system offers optimum speech transmission for guided tours, small conferences and interpretation applications with one or several speakers. The use of RF transmission allows freedom of movement for all members of the group. Due to the possibility of combining the EK 1039 receiver with different transmitters, the system can be optimally adapted to your individual needs.
The L 1039-10 charger can charge up to ten EK 1039 receivers with their BA 2015 accupacks installed. In addition, the charger allows you to charge all bodypack receivers or bodypack transmitters of the Sennheiser evolution wireless G3, evolution wireless G2 or 2000 series.
Product overview
2
41
7
4
1
3
8
7 6
5
1 Carrying handles 2 Charging compartments for up to 10 EK 1039 receivers
(with the BA 2015 accupacks installed) 3 Status LED CHARGE/ERROR, red 4 Mounting holes, e.g. for mounting the charger into a 19"
rack
5 Cable grip for mains cable 6 Hollow jack socket for connection of NT 12-50C mains
unit 7 Holes for optionally fixing/securing the receivers 8 Status LED READY, green
L 1039-10 | 3
Putting the charger into operation
CAUTION DANGER DUE TO HEAT ACCUMULATION!
The charger and the receivers can get very hot during charging. If the heat cannot dissipate, the products can be dam- aged.
Provide sufficient ventilation so that the ambient temperature of the charger does not exceed the temperature limit specified in the specifications (see page 8). Keep the charger away from heat sources and never expose it to direct sunlight.
The charger can be:
placed on a table or cabinet, installed in a 19" rack, fixedly installed in a cabinet or transport case.
Installing the charger The housing of the charger is designed so that it fits into a 19" rack. The charger can also be installed in a cabinet or transport case.
CAUTION RISKS WHEN RACK MOUNTING THE CHARGER!
When installing the product in a closed or multi-rack assembly, please consider that
the ambient temperature within the rack may increase considerably, high mechanical loading may occur, e.g. acting on the housings and cables, intrinsically harmless leakage currents of the individual mains units may accumulate, thereby exceeding the allowable
limit values.
This can cause material damage and electric shock.
Make sure that the mechanical loading of the rack is even. Make sure that the ambient temperature within the rack does not exceed the temperature limit specified in the specifi- cations (see page 8). Ensure sufficient ventilation; if necessary, provide additional ventilation. When connecting the charger to the mains, observe the information indicated on the type plate. Avoid circuit overload- ing. If necessary, provide overcurrent protection. Ground the rack via an additional ground connection.
Slide the charger into the 19" rack.
Fasten the charger to the rack by screwing 4 screws through the 4 mounting holes 4.
Attach the mains unit to the rack (e.g. using Velcro tape) so that the mains cables are not mechanically loaded.
EN D
E FR
IT ES
PT N
L R
U ZH
4 | L 1039-10
Putting the charger into operation
You can install the charger fixedly, e.g. in a cabinet or transport case. For the dimensions required for fixed installation, please refer to the below installation drawing.
57.0 mm
132.5 mm
48 2
m m
46 5.
6 m
m
58.0 mm
70.0 mm 40
0 m
m 40
.1 m
m 40
.1 m
m
L 1039-10 | 5
Putting the charger into operation
Connecting the charger to and disconnecting it from the mains To connect the charger to the mains and switch it on:
Connect the hollow jack plug of the of the NT 12-50C mains unit to the hollow jack socket 6 of the charger.
Pass the cable of the mains unit through the cable grip 5 as shown.
Connect the mains cable (EU, UK or US version) to the mains unit and to a wall socket. All status LEDs 3 and 8 light up for a brief moment. The charger is switched on and in standby mode.
6
5
NT 12-50C
EU UK US
To switch the charger off and disconnect it from the mains:
Pull out the mains plug from the wall socket.
EN D
E FR
IT ES
PT N
L R
U ZH
6 | L 1039-10
Charging the receivers
Charging the receivers Insert the bodypack receiver/transmitter with the BA 2015 accupack installed into any of the charging compartments 2 until it locks into place with an audible click. The accupack is being charged. The status LEDs 3 and 8 indicate the charging process.
When an accupack is fully charged, the charging process stops automatically. Accupacks that are left unused for extended periods of time lose a percentage of their electrical charge. This is indepen- dent of whether the bodypack receivers/transmitters are stored in the chargers charging compartments or not.
To make sure that you always use fully charged accupacks, we recommend the following steps:
Fully charge the accupacks for about 4-5 hours before use. Recharge the accupacks every 2 months at the latest.
If you store the bodypack receivers/transmitters outside the charger:
Insert the bodypack receivers/transmitters into the charger as desribed above.
Switch the charger on.
If you store the bodypack receivers/transmitters in the chargers charging compartments:
Switch the charger off and on again.
When the status LED 8 of a charging compartment lights up green, the accupack of the corresponding bodypack receiver/transmitter is fully charged.
When the status LED lights up red, the accupack is being charged.
Indications of the status LEDs
8 32
Status-LED 3 Meaning
lights up red receiver is being charged
flashes red error, charging compartment is deactivated (see page 7)
Status-LED 8 Meaning
lights up green receiver is fully charged
Charging times With a completely discharged accupack and at room temperature, the charging times are as follows: Capacity obtained Charging time approx. 100 % typ. 3-4 hours
However, charging may take longer under the following circumstances:
The accupack is deep-discharged and first has to be reconditioned by a deep discharge recovery charge. The ambient temperature is close to or over 45C/113F; in order to protect the accupack, the charging power will be
reduced until the accupack temperature has dropped to an admissible value.
Charging will be aborted and the status LED 3 will start flashing red under the following circumstances:
The accupack temperature is too low or too high (see page 8); charging starts automatically when the accupack temperature is within the charging temperature range.
The accupack is defective.
L 1039-10 | 7
Cleaning and maintaining the L 1039-10
CAUTION LIQUIDS CAN DAMAGE THE ELECTRONICS OF THE PRODUCT!
Liquids entering the housing of the product can cause a short-circuit and damage the electronics.
Keep all liquids away from the product.
Remove all bodypack receivers/transmitters from the charging compartments.
Before cleaning, disconnect the mains unit from the mains.
Use a soft, dry cloth for cleaning.
Use a brush or similar to remove dust from the charging compartments.
If a problem occurs ... Problem Possible cause Possible solution
The status LEDs 3 and 8 do not light up
Charger is not connected to the mains
Check if the charger is connected to the NT 12-50C mains unit and if the mains unit is connected to the mains (see page 5).
Unstable voltage of the mains unit Replace the defective mains unit or mains cable with a new one.Mains unit or mains cable is defec-
tive
No contact with the accupack Insert the bodypack receiver/transmitter with the accupack installed correctly into the charging compartment (see page 6).
Contacts of the receiver or contacts of the charging compartment are dirty
Clean the charging contacts of the receiver and of the charging compartment (see page 7).
Accupack is defective (overaged or defective rechargeable battery cells)
Replace the defective accupack with a new one.
The status LED 3 flashes red
Wrong accupack/individual rechargeable batteries/batteries (primary cells) have been inserted
Only charge BA 2015 accupacks (installed in a bodypack receiver/transmitter) with the L 1039-10 charger.
Accupack temperature is too low or too high
Always recharge the accupacks within the operating tem- perature range and the air humidity range stated in the spec- ifications (see page 8).
Accupack is defective (overaged or defective rechargeable battery cells)
Replace the defective accupack with a new one.
EN D
E FR
IT ES
PT N
L R
U ZH
8 | L 1039-10
Specifications
Specifications
L 1039-10 charger
Input voltage 12 15 V $ Input current max. 3.4 A
Pin assignment of DC input hollow jack socket
Charging voltage per charging compart- ment
3.7 4.1 V $
Charging current nom. 10 x 500 mA
Compatible accupacks Sennheiser BA 2015
Charging time with a completely discharged accupack and at room temperature: approx. 100 % = typ. 3-4 hours
Temperature range operation: 0 C +40 C storage: -20 C +70 C
Relative humidity, non-condensing operation: 20 % 95 % storage: 5 % 95 %
Dimensions (L x H x D), without carrying handles
approx. 482 mm x 70 mm x 132 mm (3 U)
Weight (w/o mains unit and accupacks) approx. 1750 g
Netzteil NT 12-50C
Nominal input voltge 100 240 V~
Mains frequency 50 60 Hz
Nominal output voltage 12 V $ Nominal output current max. 5 A
Standby power consumption 0.5 W
Energy efficiency level (Energy Star) V
Temperature range Operation: 0 C +40 C Storage: -10 C +70 C
Relative humidity, non-condensing max. 95 %
Dimensions (L x H x D) approx. 115 x 50 x 33 mm
Weight approx. 280 g
Cable lengths approx. 1.8 m m t