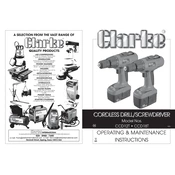
Clarke 6485055 CCD12T Cordless Screwdriver Instructions
![Clarke 6485055 CCD12T Cordless Drill Screwdriver manual cover](/images/TLxizWUkCqQUAYaFpQytUALm/thumbs/thumb175x175.webp)
To change the drill bit, first make sure the drill is turned off. Then, hold the chuck and rotate it counterclockwise to loosen. Insert the new bit and turn the chuck clockwise to tighten securely.
If the drill does not turn on, first check if the battery is charged. If it is not, charge the battery fully. If the problem persists, inspect the battery connection and ensure it is secure.
Adjust the torque settings by rotating the torque adjustment ring located behind the chuck. Choose the appropriate setting based on the material you are working with.
To maintain battery life, avoid fully discharging it before recharging. Store the battery in a cool, dry place, and do not leave it on the charger for extended periods after it is fully charged.
If the drill stops suddenly, it may be due to overheating or an overload. Allow the drill to cool down before resuming use, and ensure you are not applying excessive pressure.
To clean the drill, wipe it with a damp cloth and ensure it is dry before use. Regularly check for any debris in the vents and ensure the chuck is free from dust and dirt.
The Clarke 6485055 CCD12T Cordless Drill Screwdriver is not designed for heavy masonry work. For light masonry tasks, use the appropriate masonry drill bit and ensure the torque is set correctly.
If the chuck is stuck, try applying some penetrating oil and gently tapping it with a rubber mallet to loosen it. If it remains stuck, consult a professional technician.
It typically takes about 3 to 5 hours to fully charge the battery of the Clarke 6485055 CCD12T Cordless Drill Screwdriver. Always refer to the user manual for specific charging instructions.
Yes, replacement parts for the Clarke 6485055 CCD12T Cordless Drill Screwdriver can be purchased through authorized dealers or directly from the manufacturer's website.