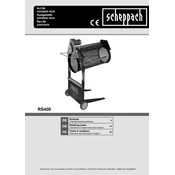
Scheppach RS400 42030000-10UK Instruction Manual

To assemble the Scheppach RS400 rotary sieve, start by laying out all parts and tools. Follow the assembly instructions in the manual, attaching the frame components first, then securely fitting the drum. Ensure all bolts are tightened properly to avoid operational issues.
Regular maintenance of the RS400 includes cleaning the sieve drum after use, checking for wear or damage, lubricating moving parts, and ensuring all bolts and screws are tight. Perform a thorough inspection monthly.
If the motor doesn't start, first check the power supply and ensure the device is plugged in correctly. Inspect the fuse and replace if necessary. Verify that the motor's thermal overload protection has not been triggered. If problems persist, consult a professional technician.
The RS400 is designed to process materials up to 40mm in size. Larger materials may reduce efficiency or cause blockages, so it's important to pre-screen and remove oversized items.
To clean the sieve drum, turn off and unplug the machine. Use a brush to remove debris from the drum and rinse with water if necessary. Ensure the drum is thoroughly dry before storage to prevent rust.
If the drum clogs, turn off the RS400 immediately and unplug it. Remove the obstruction manually, avoiding sharp tools that might damage the mesh. Restart the machine after resolving the clog.
The RS400 is primarily designed for dry materials. Using it with wet materials may cause clogging and reduce efficiency. If processing wet materials is necessary, ensure thorough cleaning and drying of the drum afterward.
Adjust the tilt angle by loosening the adjustment knobs located on the sides of the frame. Set the drum to the desired angle for optimal material flow and tighten the knobs securely before operation.
Always wear protective gloves and eye protection when operating the RS400. Ensure the machine is on stable ground, and never reach into the drum while it's running. Disconnect from power before performing maintenance or troubleshooting.
To replace the sieve drum, disconnect the machine from power. Follow the disassembly instructions in the manual to remove the damaged drum. Install the new drum by reversing the disassembly steps, ensuring all connections are secure.