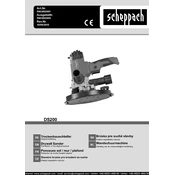
Scheppach DS200 5903802901 Operating Manual

To change the sanding disc on the Scheppach DS200, first ensure the sander is unplugged. Loosen the disc screws using the appropriate tool, remove the old disc, and align the new disc with the holes. Secure it by tightening the screws.
Always wear safety goggles and a dust mask when operating the sander. Ensure the work area is well-lit and free of obstructions. Keep hands away from the sanding surface during operation.
To minimize dust, ensure the dust collection bag is attached and empty it regularly. Consider using an external vacuum system for improved dust management.
Check if the power cord is properly connected and inspect the fuse in your power supply. If the problem persists, consult the user manual for troubleshooting steps or contact customer support.
Replace the sanding disc when it shows signs of wear or becomes less effective. The frequency will depend on usage, but regular inspection is recommended to ensure optimal performance.
Yes, the DS200 can be used on metal surfaces. However, ensure you use an appropriate sanding disc designed for metal to achieve the best results and avoid damage.
Regularly clean the sander, especially the dust collection system. Inspect the power cord for any signs of damage and replace if necessary. Lubricate moving parts as per the manufacturer's guidelines.
Use the appropriate grit of sanding disc for your material and project. Start with a coarser grit and progress to a finer grit for a smooth finish. Keep the sander moving evenly across the surface.
Excessive vibration can be caused by an unbalanced sanding disc, worn bearings, or improper mounting. Check that the disc is mounted correctly and inspect the bearings for wear.
Ensure the workpiece is securely clamped and the sander is held flat against the surface. Check that the sanding disc is flat and free from defects. Adjust your technique to maintain consistent pressure.