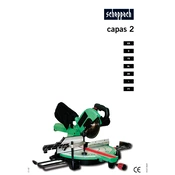
Scheppach Capas 2 88001916 Instruction Manual

Scheppach Capas 2 88001916 Saw manual cover
Pages 44
Year 0
Language(s)
German de
English en
French fr
Italian it
Danish dk
Dutch; Flemish nl
Portuguese pt

Scheppach Capas 2 88001916 Saw Specification

The Scheppach Capas 2 88001916 Saw is a high-performance cutting tool designed for both professional and DIY enthusiasts seeking precision and efficiency in their woodworking tasks. This saw is engineered with a robust motor that delivers consistent power, allowing for smooth and accurate cuts across various materials. Its compact design combines durability with portability, making it ideal for use in different work environments. The saw features an adjustable cutting angle that enhances versatility, accommodating a range of cutting needs from straight to bevel cuts. Its sturdy construction includes a high-quality blade that ensures longevity and precision, reducing the need for frequent replacements. The Capas 2 is equipped with an integrated dust extraction system that maintains a clean work area, improving visibility and safety during operation. Safety is further enhanced by its ergonomic handle, providing a comfortable grip and reducing user fatigue during extended use. The saw also includes a quick-release mechanism for easy blade changes, minimizing downtime and maximizing productivity. Designed with user convenience in mind, the Scheppach Capas 2 88001916 Saw combines advanced features with reliable performance, making it a valuable addition to any workshop.

Scheppach Capas 2 88001916 Saw F.A.Q.

How do I change the blade on the Scheppach Capas 2 88001916 Saw?

To change the blade, first unplug the saw. Use the wrench provided to loosen the arbor nut, remove the old blade and carefully install the new blade ensuring the teeth face the correct direction. Tighten the arbor nut securely before use.

What is the correct way to align the fence on the Scheppach Capas 2?

Ensure the saw is unplugged. Loosen the fence locking lever, adjust the fence parallel to the blade using a square for accuracy, and then tighten the locking lever securely.

What should I do if the saw is not starting?

Check that the saw is plugged in and that the power switch is functioning. Inspect the fuse or circuit breaker to ensure it hasn't tripped. If the problem persists, consult the user manual or contact customer support.

How often should I perform maintenance on the Scheppach Capas 2 saw?

Regular maintenance should be performed every 20 hours of use. This includes cleaning the sawdust from the machine, lubricating moving parts, and inspecting the blade for wear or damage.

What safety precautions should I take when using the Scheppach Capas 2 saw?

Always wear safety glasses and hearing protection. Ensure the work area is well-lit and free of obstructions. Never operate the saw without the appropriate guards in place and keep hands away from the blade.

How can I reduce tear-out when cutting with the Scheppach Capas 2?

Use a sharp blade suited for the material. Apply masking tape along the cut line to support the fibers and reduce tear-out. A slower feed rate can also help achieve cleaner cuts.

What is the maximum cutting depth of the Scheppach Capas 2 saw?

The maximum cutting depth of the Scheppach Capas 2 saw is approximately 85 mm at 90 degrees and 60 mm at 45 degrees. Always refer to the user manual for accurate specifications.

Why is the blade wobbling during cuts?

Blade wobbling can occur if the blade is not properly secured. Ensure the arbor nut is tight. If the problem persists, check for a bent blade or damaged arbor. Replace if necessary.

Can I use the Scheppach Capas 2 for cutting metal?

The Scheppach Capas 2 is primarily designed for cutting wood. If metal cutting is necessary, ensure you use the appropriate blade designed for metal and follow all safety guidelines.

How do I adjust the bevel angle on the Scheppach Capas 2 saw?

To adjust the bevel angle, loosen the bevel lock lever, tilt the saw to the desired angle using the bevel scale for reference, and then tighten the lock lever to secure the position.