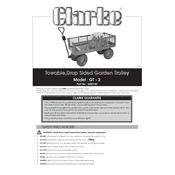
Clarke 3400180 GT2 Towable Drop Sided Garden Instructions

Clarke 3400180 GT2 Towable Drop Sided Garden Trolley manual cover
Pages 2
Year 0
Language(s)
English en

Clarke 3400180 GT2 Towable Drop Sided Garden Trolley Specification

The Clarke 3400180 GT2 Towable Drop Sided Garden Trolley is a robust and versatile solution for transporting heavy loads in garden and landscaping environments. This trolley is constructed with a durable steel frame designed to withstand rigorous use while maintaining stability and longevity. Its drop-sided feature allows for easy loading and unloading, accommodating varying cargo sizes and enhancing accessibility for efficient operation. The trolley is equipped with large, pneumatic tires that provide excellent traction and smooth maneuverability across different terrains, ensuring ease of transport in various outdoor conditions. With a substantial load capacity, the GT2 is ideal for carrying soil, plants, tools, and other gardening materials, thereby boosting productivity and reducing physical strain on users. The towable aspect of this trolley makes it compatible with garden tractors and ATVs, allowing for effortless towing and further expanding its utility in larger outdoor spaces. Additionally, its ergonomic handle design ensures comfortable manual handling when needed. This garden trolley embodies a practical blend of functionality and durability, making it a valuable asset for both amateur gardeners and professional landscapers seeking reliable equipment to streamline their tasks.

Clarke 3400180 GT2 Towable Drop Sided Garden Trolley F.A.Q.

How do I assemble the Clarke 3400180 GT2 Towable Drop Sided Garden Trolley?

Start by laying out all parts and tools required for assembly. Follow the provided instruction manual step-by-step, ensuring all nuts and bolts are tightened securely. Make sure the drop sides are correctly aligned and the towing hitch is properly attached.

What is the maximum load capacity of the Clarke 3400180 GT2 Garden Trolley?

The maximum load capacity of the Clarke 3400180 GT2 Garden Trolley is 350kg. Ensure not to exceed this weight to maintain safety and functionality.

How can I maintain the wheels of the Clarke 3400180 GT2 Garden Trolley?

Regularly check the tire pressure and inflate as needed. Clean the wheels to remove any debris and lubricate the wheel bearings periodically to ensure smooth operation.

What should I do if the trolley's sides are not locking properly?

Inspect the locking mechanism for any obstructions or damage. Clean the latch area and ensure the pins are aligned correctly. If the problem persists, refer to the manual or contact customer support.

Can the Clarke 3400180 GT2 Trolley be used on all terrains?

The trolley is designed for use on a variety of terrains including gardens and fields. However, avoid extremely rocky or uneven surfaces to prevent damage to the trolley and ensure user safety.

How do I attach the trolley to a towing vehicle?

Align the trolley's towing hitch with the towing vehicle's hitch ball. Secure it using a pin or lock mechanism as per the instruction manual to ensure a safe and stable connection.

What maintenance is required for the Clarke 3400180 GT2 Garden Trolley?

Regularly clean the trolley to remove dirt and debris. Check for any loose bolts and tighten them as necessary. Lubricate moving parts and inspect the wheels and towing hitch for wear and tear.

How can I store the Clarke 3400180 GT2 Garden Trolley when not in use?

Store the trolley in a dry, covered area to protect it from the elements. Ensure it is clean and dry before storage to prevent rust and damage. Consider disassembling the side panels for more compact storage.

What should I do if the trolley tips over while in use?

Immediately stop using the trolley and assess the load distribution. Ensure the load is evenly distributed and within the weight limit. Use the trolley on stable, level ground to prevent tipping.

How do I replace a damaged side panel on the trolley?

Obtain a replacement panel from the manufacturer or authorized dealer. Remove the damaged panel by unscrewing or unlatching it, then attach the new panel securely following the assembly instructions.