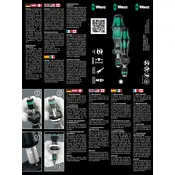
Wera 7441 Kraftform 0.3-6.0 Nm Manual

To calibrate the Wera 7441 Kraftform screwdriver, use a torque tester. Set the screwdriver to the desired torque setting, apply it to the tester, and adjust as necessary to match the indicated torque value on the tester.
Regularly clean the screwdriver with a soft, dry cloth to remove dirt and debris. Store it in a dry place, and periodically check for wear on the bits and handle. Lubricate moving parts with a light machine oil if necessary.
First, recalibrate the screwdriver using a torque tester. If the issue persists, check for any mechanical damage or wear. If needed, contact Wera customer support for further assistance.
Yes, the bits on the Wera 7441 Kraftform screwdriver are replaceable. Simply pull the existing bit out and insert a new compatible bit until it clicks into place.
The Wera 7441 Kraftform screwdriver is not specifically insulated for electrical work. If electrical insulation is required, use tools specifically rated for electrical safety.
Store the screwdriver in a cool, dry place, preferably in a tool case or organizer to prevent exposure to moisture and accidental drops. Avoid leaving it in direct sunlight or near corrosive materials.
Clean the handle with a mild soap and water solution, then dry it thoroughly. Ensure your hands are clean and dry before use to improve grip.
The Wera 7441 does not feature a torque lock. However, ensure that the setting is not easily changed by carefully handling the tool and checking the setting before each use.
Check for visible damage, ensure the bits are securely attached, and verify that the torque setting is correct. If the issue persists, consult the user manual or contact Wera support for further troubleshooting.
Calibration should be done annually or more frequently if the screwdriver is used in high-precision applications or subjected to heavy use. Regular calibration ensures the accuracy and reliability of the torque settings.