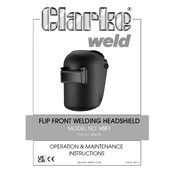
Clarke 6000705 HSF1 Flip Front Welding Instructions
![Clarke 6000705 HSF1 Flip Front Welding Headshield manual cover](/images/jNkulhNcBXRYIhtBuLHVZSpX/thumbs/thumb175x175.webp)
To adjust the headband, locate the adjustment knob at the back of the headshield. Turn the knob clockwise to tighten and counterclockwise to loosen until the headshield fits comfortably on your head.
If the flip front mechanism is stiff, clean the pivot points with a dry cloth to remove any debris. Apply a small amount of silicon spray lubricant to the hinges to ensure smooth operation.
To replace the lens, gently lift the flip front and remove the old lens by sliding it out of its holders. Insert the new lens by sliding it into the holders, ensuring it is securely in place.
Regularly clean the headshield with a soft cloth and mild soap solution. Ensure all moving parts are free of debris and lubricate the hinges occasionally. Check the headband for wear and replace if necessary.
Inspect the tension on the pivot screws. Tighten the screws slightly if the headshield does not stay up. Be careful not to overtighten, as it may restrict movement.
Yes, the Clarke 6000705 HSF1 can be used for grinding applications. Ensure the appropriate lens is installed for grinding, as welding lenses may be too dark.
Use a microfiber cloth and a lens cleaning solution to gently wipe the lens. Avoid using abrasive materials or cleaners that could scratch the surface.
Store the headshield in a cool, dry place away from direct sunlight. Hang it by the headband or lay it flat to prevent distortion of the shape.
Yes, the headband can be replaced. To do so, detach the current headband by unfastening the side clips. Attach the new headband by securing it with the clips into the provided slots.
Before each use, check the headshield for cracks, broken parts, or any signs of wear. Ensure the lenses are clean and free from scratches. Test the flip mechanism to ensure it operates smoothly.